Table of Contents
What You Will Do
- Start your base map.
- Learn about zones and sectors, and see why these are such important parts of your design process.
- Identify the components in a sustainable home system and examine how they can flow into each other.
This is the place in the course where you should start peeking into the Design Studio. Pop over there, explore the first couple of classes, and then come back.
And, we recommend you create the first draft of your base map now. Here’s how:
Your base map, demystified
This section by Heather Jo Flores
One of the most common sticking points for our students is the base map, so let’s take care of that right now!
Simply put, you make a base map is by drawing lines on a grid that mark out the property lines, permanent structures, and main pathways on your site. The base map is just that: the base of your design.
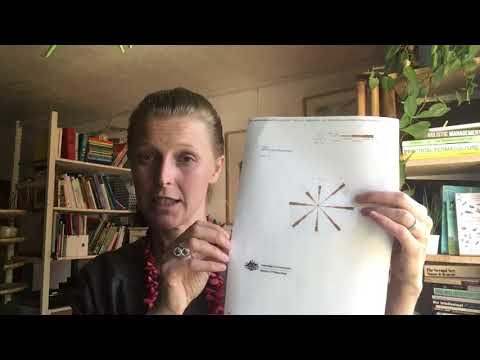
Watch this short video for more explanation and some examples:
There is no one way to do it. You kind of just have to jump in and get it done however makes sense to you. If you were making a painting, you would sketch out the outlines first, right? That’s all the base map is, it’s a sketch of the outlines. To give you something to design onto, in 2D space.
From there, the rest of your design is built as layers onto the same base map. You can even just draw it once and make photo copies, if you want to work in analog space. Or use the base map as the bottom layer of your digital project.
Your base map should contain:
- Permanent structures
- Driveways or access roads
- Permanent walkways
- Property lines and utilities
- Big trees and permanent vegetation
- Fences and walls
- Contour lines
- North indicator
Base mapping can be useful for non land-based projects as well. If you are re-designing something, make a visual representation of what is there first. For instance, if you want to redesign your daily schedule, write down what actually happens right now. This will give you something to build from. If it is a new business, make a map of existing businesses in your area.
As you work through these topical modules, you’ll add layers to the map as needed. If we just put all the information on the base map it would get too messy and we can’t really see what is going on. By putting them on separate pages we can combine just a few of them at a time to start seeing trends. If you’re working digitally, these will be transparent layers in your document. If working with analog tools, layers usually show up as tracing paper overlays and/or multiple photocopies of the base map, each with a different set of information.
Use these tools and tutorials to guide you.

Pro-tips for beginner base-mappers:
1. You may be able to acquire the “as-built,” or “plat map” for your house. Ask the city or your landlord. If you don’t have an as-built, the next best thing is to use google maps to print out and trace or make a digital copy. Other starting places include satellite imagery, recent aerial photos, agricultural maps (soil and water conservation district), department of natural resources maps, or other governmental sources.
2. Use a measuring wheel. Not a measuring tape. Invest in a rolling tape with a long handle that you roll on the ground. This will give you a much more accurate reading than if you try to stretch a builder’s tape across the land.
3. Use a compass. The directions matter. Use them, mark them, understand how they relate to the sectors and, by extension, your design.
3. Be precise. A square centimeter of space on your base map could translate to several square meters of physical space on your site. The more precise you can be in your mapping, the less energy you will spend on corrections during implementation. Once you rough out the main areas, take the time to go back in and fix the details.
4. Use digital tools. All of the above tips, and more, become much easier when you use digital tools to create your multi-layered designs. This might be easier (and cheaper) than you think it is!
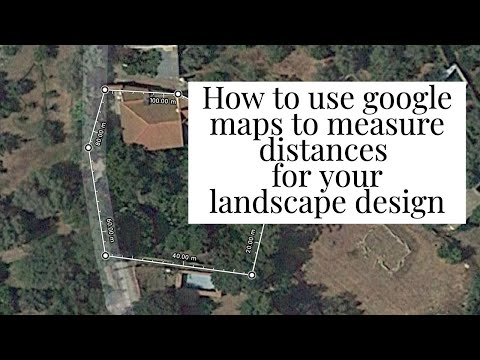
As you may already know, this link will lead you to a plethora of tutorials.
Here’s one about how to use Google Maps to measure distances on your landscape
And here’s one, for more analog thinkers, about how to learn your pace length. This will be a huge help when you need estimate distances on a landscape, on the fly.
Your home is a system
this section by Crystal Stevens
When you begin to look at your own site through an ecological lens, you begin to see your home as a system in which the zones and sectors can provide a foundation for your design.
The home and site are a functioning system, defined by zones of use.
There are many factors influencing the ecosystem you inhabit, and this includes your home, whether it is an apartment, a house with a small garden, or a farm.
- When looking at your home system, it is helpful to think about the following questions:
- Where are you on the map?
- What region are you in?
- What hardiness zone do you live in?
- What is the major landscape?
- What are the underlying characteristics of the ecosystem of your site?
- What are the major forces influencing your site?
Remember that as well as factors such as the local geography and climate, social factors and invisible structures are also an important consideration, such as who lives in your home, who visits regularly, relationships with your neighbours and local laws and customs.
One way to truly grasp this concept is by examining your existing home system as a model.
- How is your home system functioning at this present moment?
- Is there a good flow or are there obstacles resurfacing throughout the day in your system?
- How do you want to change it?
- Is it a simple change or a multifaceted series of complex changes that need to be done in phases?
When looking at the home system, it is important to think about ecological ethics and principles that are applied to each zone in your home system.
- How much of your comfort level are you willing to shift or sacrifice in the interest of ecological design, earth stewardship and earth care?
- How do your daily choices affect those around you?
- How are your daily activities affecting the ecosystem you reside in?
- How can you make small and slow changes to be a part of the solution?
- Are there giant leaps you are willing to take?
It’s overwhelming!
Try focusing just on the kitchen:
- What do you eat?
- How much money do you spend on food?
- Are you growing most of the food you need?
- Are you canning and preserving your own food?
- What percentage of food do you grow and preserve?
- What changes would you like to make with the food you purchase and consume?
- What are the obstacles preventing you from moving toward a more self-reliant economics system?

It makes sense to grow our own food in our own backyard first. What we can’t grow ourselves, we can acquire at local community gardens and small farms, or by supporting local farmers markets. We can then support area businesses, which are purveyors of local foods. Only when we have utilized all of our local resources should we visit supermarkets to complete our food needs.
This mindset offers a creative insight into how our perception of food consumption needs to shift in order for us to support the local foods movement. Beyond food, we see a solution-based concept that examines the big picture in all aspects of life; primarily, how each of the basic human needs are interconnected and how to fulfill these needs while considering sustainability.
Let’s go back to the home system and examine some other ways in which we can assess our system. Calculating and brainstorming ways to reduce water usage, energy consumption, transportation, and overall consumerism is an important process in integrating ecological ethics into the Home System.
We’ll circle back around to these topics as you move through the course. For now, just start to think about your home as a system, and start to notice the connections that occur within it.
Are all the components of your home and land functioning together seamlessly in a whole systems approach?
We will work through these and many more questions in the design studio but for now simply take a breath and contemplate each question, for whatever it means for you right now:
- Are you stacking functions?
- Are you obtaining a yield?
- Are different elements of your design working together?
- Are the plants serving multiple purposes?
- Are you working toward a closed loop system?

Design thinking, systems thinking
this section by Pippa Buchanan
Ecological design involves thinking about systems and the interaction between their components. These can be at the microscopic level whether that be the activity of microbial life that supports healthy soils or the way members of a community group make decisions. Understanding the systems that we work with involves understanding their current status in order to propose appropriate changes in our design. Systems thinking is a core aspect of our work as designers.
Pippa goes into more detail here:

What are zones and sectors and how do they apply to the home system?
(this section by Crystal Stevens)
Observation is always the very first step in any design. Before we act, we must observe. And in the observation phase of our design process we always map the zones and sectors.
Zones are patterns of human use, and sectors are energies that flow through our system from the outside and impact it. Sectors can be natural elements such as wind or sunlight, and there can also be other external influences you need to consider, such as your neighbour using fertilizers that then seep into your land, a tree next door that will grow over the years and might cast shade over your plot, or an empty lot next to yours that might be built on in the near future, should laws change.
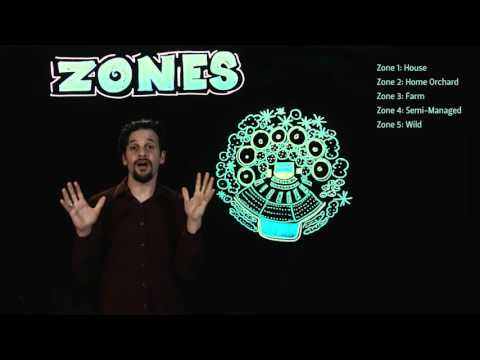
Let’s start with zones:
Once we have a reasonable understanding of what we’re working with, we can start designing by placing components in different zones, or areas of similar energy input needed from the person who implements the design.
As such, we have zones 1 to 5, where zone 1 reflects your immediate surroundings, the places you visit daily (bedroom, toilet, kitchen garden, etc.), zone 2 contains places you go several times a week (maybe greenhouse, bathhouse, workshop), zone 3 is where you go once a week or less, and could be an orchard, in a rural setting, or a community garden in an urban environment; the details vary, there’s lots of cross over, and it’s all site-specific.
Zone 4 tends to be stuff like field crops and firewood, seasonal events and long-term storage, and Zone 5 is typically called the “wilderness” zone, and remains largely unmanaged by the designer, but is still visited and slightly controlled.
And Zone 0 (or 00, depending who you ask) is you, the designer, and your immediate life-support system.
In zone mapping, the house is referred to as the centralized hub of human activity. The home is more efficient and functions better when everything has its place, when items are organized, and when clutter is minimal. Our homes are the places we retreat to. The home system is where we can reduce our carbon footprint while building a legacy of green handprints.
It is important to start at home when designing the home system since the home is the central hub for our activities. If our home functions well as an ecological system, then our other endeavors will be more successful and we will have overall better organizational and design skills. We will delve into zone and sector mapping in detail throughout the module.
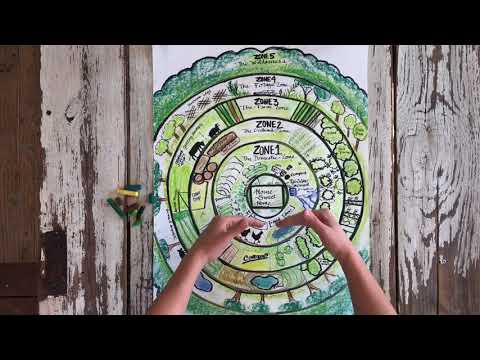
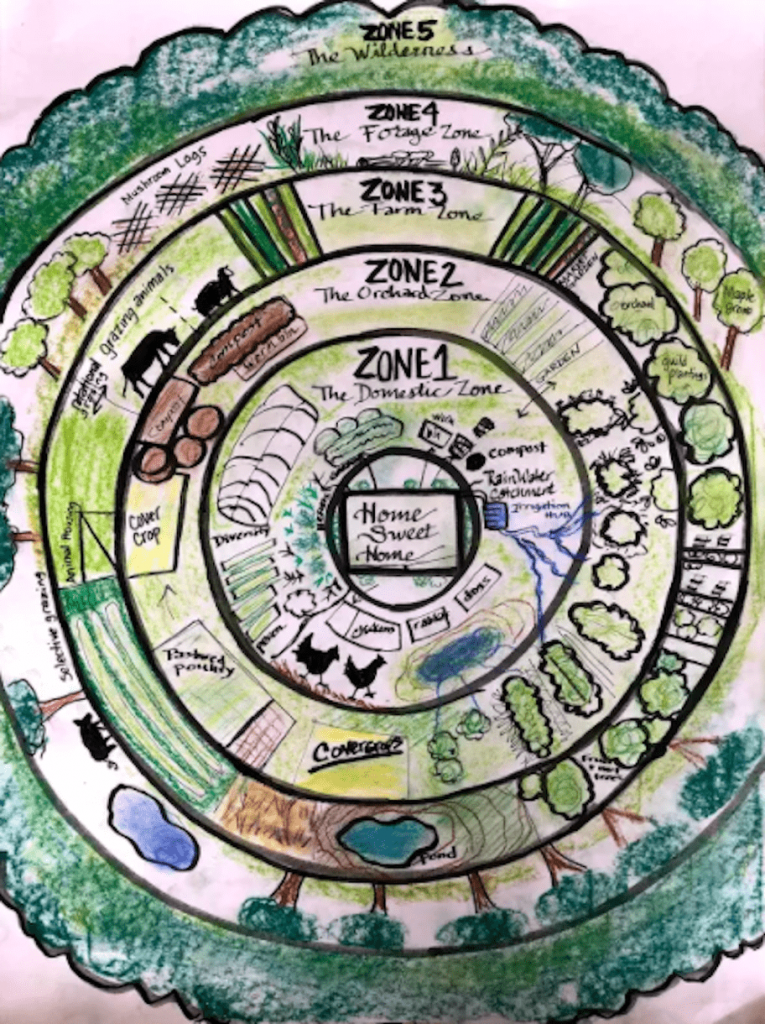
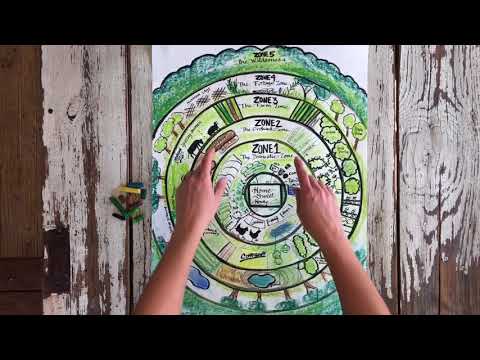
Put simply, the zones indicate how frequently we visit or use a particular area. On the basic assumption that the closer an area is to us, the more often we will use or visit it, the zones are arranged theoretically as concentric circles spreading out from us and our home at the centre. Of course, in reality, few zones are perfect circles, and they may change over time as our needs and habits change, or as other factors change.Mapping the zones of your home system is a useful exercise that can open up fresh perspectives and bring unexpected realizations to light, so the next video looks at Zone Mapping.
As you can see from the zone map, the zones in this home system model range out from the house at the centre. Put simply, zones are identified not just in terms of location, but also in terms of how often they are visited, managed or used. So zone 1 is in daily use, and zone 2 is perhaps in use every other day. Zone 3 might be somewhere you go once a week, while zone 4 you may only visit a few times a year. Zone 5 you rarely visit or use, and zone 6 is places you never go to, but they may affect you or your site.
Thinking about zones in terms of time as well as distance makes it easier to understand that things in zones nearer to the centre will receive more of our attention than those further away. Being aware of this can have a significant impact on how we approach designs.
This way of looking at things, with things that are nearer being easier to manage and receiving more attention, may alter your perspective and your approach to, for example, food growing. You may be interested to know that a UN study backs this up. The IAASTD study was set up to look at food security world wide, and was expected to find that the solution is industrial, large-scale agriculture and biotechnology. Instead, they found that gardens and small farms are far more productive. Zone mapping enables landscape designers to explain why this is.
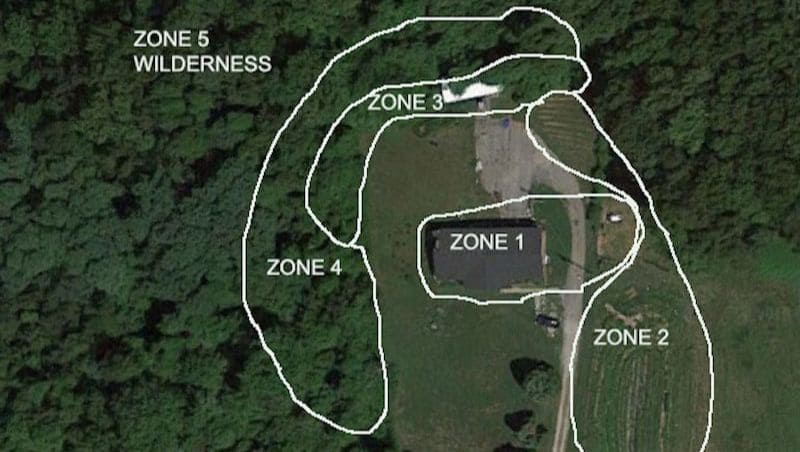
Of course, in reality zones are rarely, if ever, perfect circles. Paths between places often create loops in the zones. For example, plants alongside the path from the door to the gate will receive more attention than plants a similar distance from the house but away from a path. Knowing this, you might decide it would be convenient to have soft fruit along this path. Conversely, you might decide that as your arms are always full when you come home, you would not be able to pick any fruit and in fact fragrant herbs and flowers would provide a welcome and help you switch off and relax. Either way, the path becomes more than just a way from A to B. By using the convenience and accessibility of the path side, you are making the path multi-functional.

Zones of Human use
We’ve defined the pattern, let’s look at each section.
Zone zero: you, the designer, and your immediate needs.
In this course we call it the inner landscape, and I want to reiterate how important self-care is, and to provide some tips.
Ensuring our bodies and minds are functioning efficiently is important in maintaining our strength, resilience and endurance, to help us care for our projects with relative ease. Our health is an important factor to consider in terms of what we allow in our home system.
The human body.
The external environment is not the only place where symbiotic relationships are taking place. Let’s look at the human body as an example. The human body is an excellent analogy in examining how multiple systems are all functioning together for the whole system to work efficiently. The human body is a complex, functioning entity with several systems working in harmony.
The body is made up of the the skeletal system, the muscular system, the nervous system, the endocrine system, the digestive/excretory system, the circulatory system, the lymphatic/immune system, the integumentary/exocrine system, the respiratory system, reproductive system, and the renal/urinary system. Most of the systems require assistance or support from the other systems. For example, when blood circulates through the digestive system, it absorbs nutrients from the contents of partially digested food.
Our health is an important factor to consider in terms of what we allow in our home system. The human body is also an excellent analogy in examining how multiple systems are all functioning together for the whole system to work efficiently. Read this article to learn more about how the systems of the body rely on one another.
Self-care checklist:
- Healthy immune system boosted with herbal support
- Healthy gut microbiota via probiotics such as sauerkraut, kimchi, yogurt, and kombucha.
- Get at least seven hours of sleep each night.
- Limit your intake of sugar and alcohol.
- Stay hydrated by drinking at least 60oz of water each day
- Get plenty of fresh air and exercise.
- Limit screen time when possible.
Home apothecary 101.
Stock your home apothecary with homegrown medicinal herbs from your garden. Herbs serve a purpose in your home system, and often, medicinal herbs have stacking functions: They provide food and habitat for wildlife, and they help to aerate the soil with their roots.
They are beautiful and create a peaceful and welcoming oasis in the garden. They provide medicine for humans.
In the USA, most of the supplies needed for your own herbal apothecary can be purchased online through Mountain Rose Herbs or Starwest Botanicals, or at your local herb store or natural foods store.
Herbal body care.
When it comes to herbal body care, I use the same set of standards for checking food labels. If I can’t pronounce it or don’t know what it is, it’s probably not a good idea to put it in or on my body. For me, transitioning to homemade herbal body care was easy. Lotion, body wash, shampoo and conditioner were really the only products I bought. I didn’t wear makeup. I didn’t use hair spray or shaving gel or all the other dozens of products marketed toward women.
But even for people who do rely on store-bought beauty products, making the transition is actually quite easy. Coconut oil alone could replace several beauty care products. To name a few benefits, it is a wonderful lotion, can be used as a mouth rinse to fight cavities, and it makes hair shiny and healthy. See the “optional hands-on” section for a bunch of DIY home remedy articles.
Ditch the toxins in your household!
Harsh chemical cleaners are harmful to the environment and toxic to our bodies. Some cause acute problems such as skin or respiratory irritation, watery eyes or chemical burns, while others are associated with chronic or long-term effects such as cancer.
The most acutely dangerous cleaning products are corrosive drain cleaners, oven cleaners and acidic toilet bowl cleaners, according to the Washington Toxics Coalition. Corrosive chemicals can cause severe burns on eyes, skin and, if ingested, in the throat. Ingredients that can cause acute toxicity include chlorine bleach and ammonia, which produce fumes that are highly irritating to eyes, nose, throat and lungs, and should not be used by people with asthma, lung or heart problems.
A few safe and simple ingredients such as liquid castile soap, water, baking soda, vinegar and lemon juice, aided by a little elbow grease, can tackle most household cleaning needs. These ingredients are eco-friendly and affordable. It is a myth that we need harsh chemical cleaners to do our dirty work; natural cleaners are just as effective for the majority of all cleaning tasks.

Zone 1: home sweet home, the domestic zone
Zone one includes the home, the central hub of our activity. A place where we rest and recuperate, eat, sleep, gather, dream and create.
Everyone’s home is different. Some people prefer quiet, minimalist spaces while others thrive in busy chaos. Within the shared and different preferences of the household, there is space for creating systems that reduce the amount of work needed to keep the home as you all prefer it. So often, time and energy (and tempers!) are lost looking for things. Mapping the zones and sectors inside the house can serve as a useful observation tool and help reveal fresh insights into how the house and its occupants function.
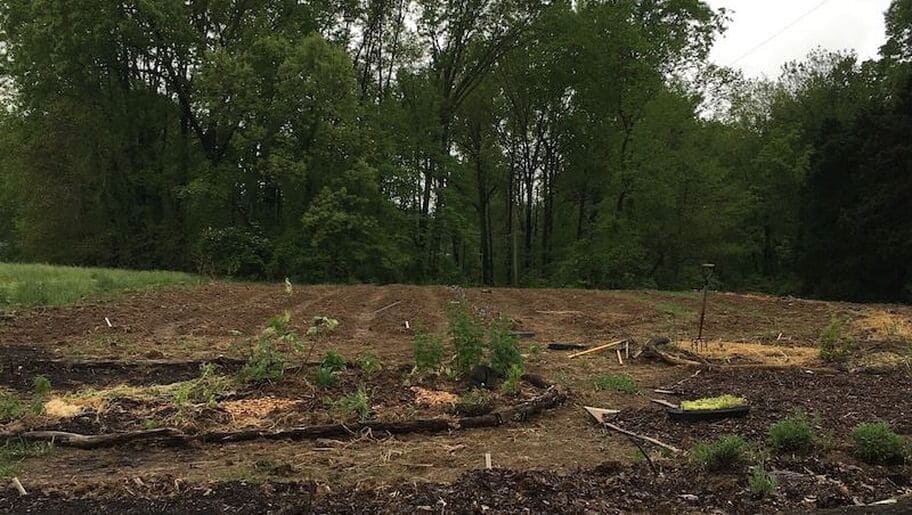
An example from my own home system:
For the last several years, I have been eliminating things that no longer serve me in my home. Each month, I dedicate a day to go through old bins of paperwork, fill a few bags of donation items, re-organize spaces that are not functioning efficiently, etc. Through this process, I have been able to organize zones of my home by categories. Because my husband and I are multifaceted and have way too many hobbies, we have several functioning zones throughout our home.
We have an area that functions as an art studio with shelves for clearly labeled art supplies. We have an area designated to our gardening resources, which houses our seed library, gardening books, and small gardening supplies, such as small tools and gloves. We also have a home apothecary, stocked with homegrown dried herbs, tinctures and oil infusions in process, herbal medicine making supplies, and a resource library for herbs and herbalism. We have a huge farm table in our dining room that serves multiple purposes; as a place to have family meals, an arts and crafts area, and a seed starting workspace. This table is located in a room where we host workshops.

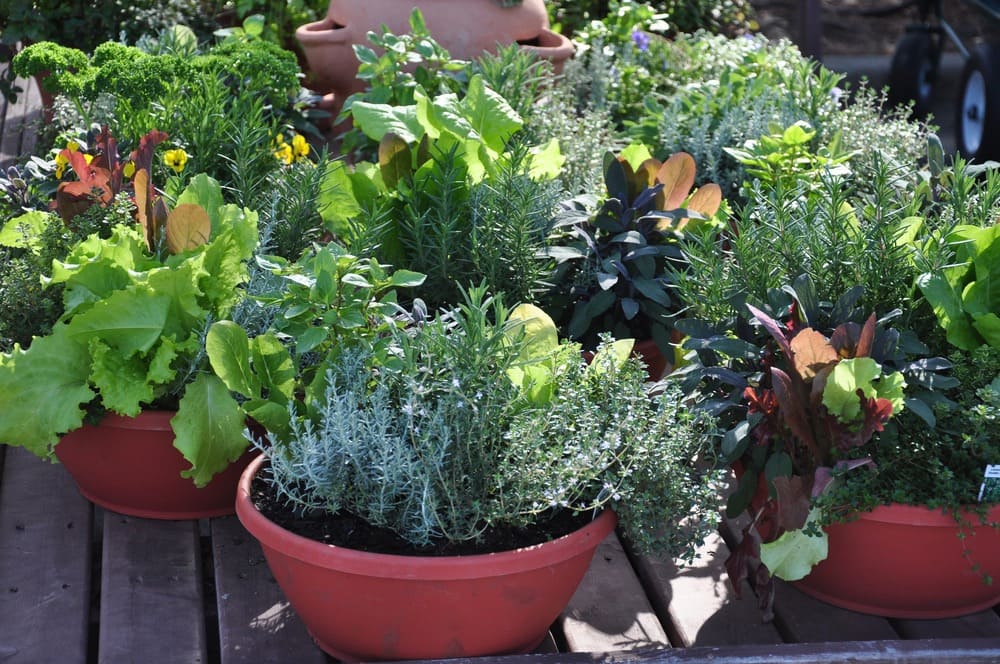
Growing and storing food in Zone 1.
There are a surprising number of things you can grow indoors, especially if you have a sunny windowsill or two. Sprouting seeds and growing microgreens can be done all year round, and are a great source of vitamins in the winter months. However, sprouting seeds works best in drier climates. In humid areas mould can be a problem so you may find you need to sterilise glass jars in the oven between crops.
Houseplants don’t have to only look nice! Spider plants are renowned for cleaning toxins the air, but they are not the only ones that do this as this poster shows. Some of these plants, such as ferns, prefer not to be in direct sunlight, leaving that sunny windowsill free for other things.
Aloe vera is a useful plant to have in the kitchen as a living part of the first aid kit. Dab some of the goo from a leaf on a burn for instant relief. (Hold the injured part under cold water first.)
There are several edible plants you can grow indoors which means that even in an apartment you can grow some of your own food. Herbs are a great addition to a kitchen windowsill, especially as you only need a small amount to transform a dish. Don’t forget to water them! Keep an eye out for aphids. These can be squished or else brushed off with the help of soapy water. Or simply swap the pot with one outside, and let the ladybirds enjoy the aphids!
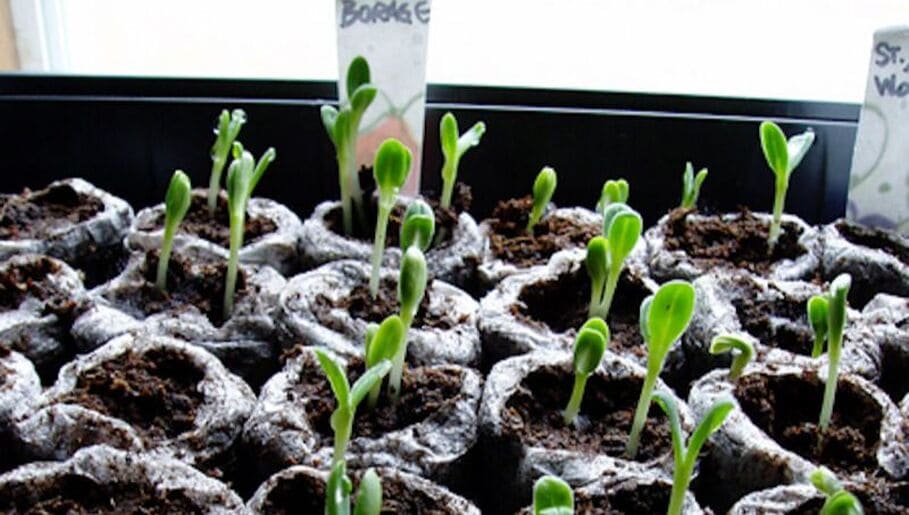
A sunny windowsill is also a good place to get seedlings off to an early start in Spring. Don’t forget to protect them from frost on cold nights, especially if they are behind thick curtains, and keep the soil moist with a fine spray mist.
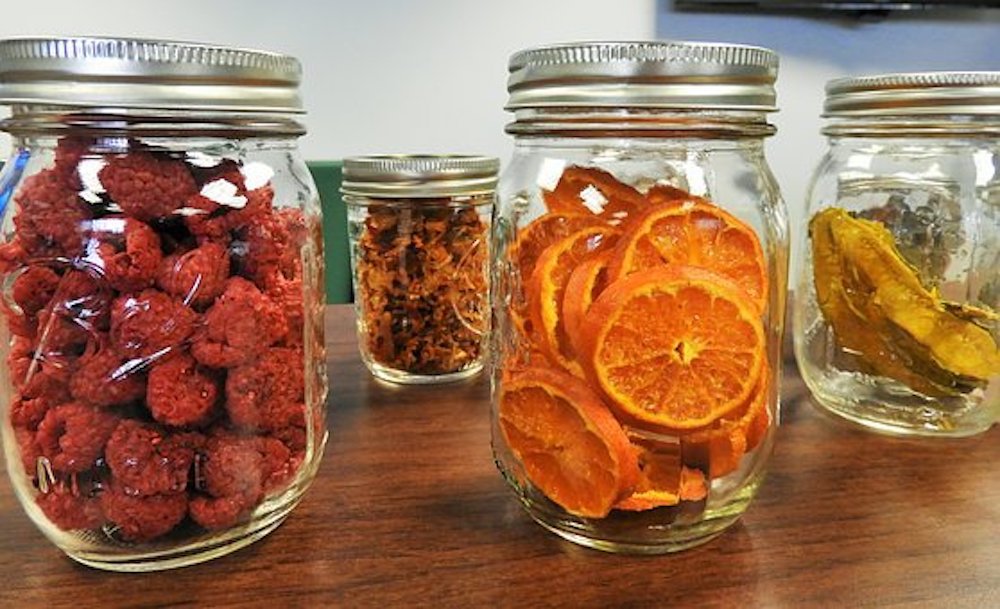
A pantry or a cupboard where you can store preserved food is a way of extending the season and enjoying the harvest long after the fruits have gone. Bottling or canning is a useful skill to learn, as is making jam, pickles and chutneys and also fermentation.
Zone 1 can also include the area immediately outside your house. Consider how to make best use of this space. Take advantage of the fact that it is so close and you pass it regularly. It’s worth taking time to sit or stand at the door as you make your plans.
Zone two: the home orchard zone.
This zone is fairly near the house, so is easy to keep an eye on things. You might not go here every day, but perhaps most days of the week. Think through what you want to grow that will need regular attention, such as vegetables, soft fruit and herbs.
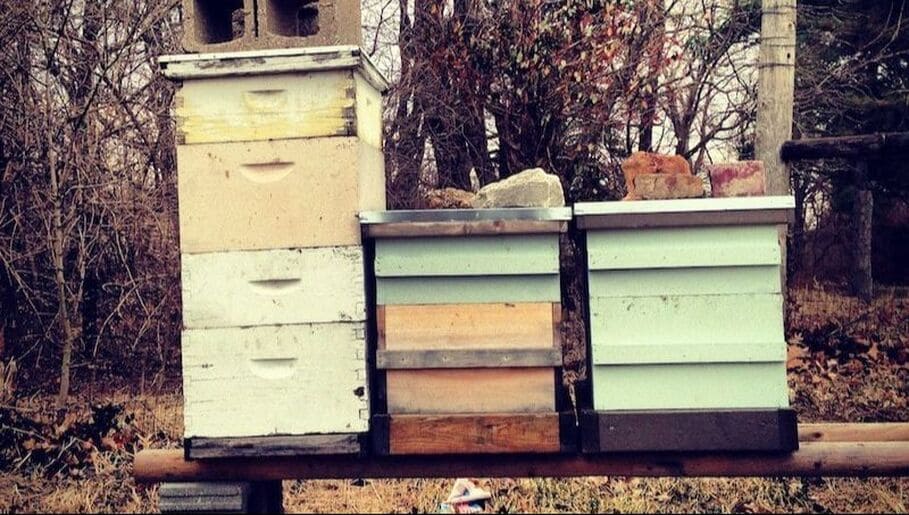
Other components that need to be relatively close to the house include the worm bin or composting area, chickens and other small animals, the woodshed, tool shed and workshop. A greenhouse or polytunnel, and cold frames also need to be in this zone.

This zone could have animal housing, rotational grazing, small pastures, cover crops, permanent raised beds, polyculture guilds, nitrogen fixers, pollinator attractors, grazing between rows, interplanting of vegetables, and ponds.
Zone three: the farm zone
Because this zone is a bit further from the centre, you will visit less frequently, perhaps only once or twice a week. This determines how you use this area. It’s ideal for plants that need some care and attention but don’t need this every day. Animals of course still need checking daily but a well thought out design means that those grazing in this zone don’t normally need food and water brought to them.
Because this zone is a bit further from the center, you will visit less frequently, perhaps only once or twice a week. This determines how you use this area. It’s ideal for plants that need some care and attention but don’t need this every day. Animals of course still need checking daily but a well thought out design means that those grazing in this zone don’t normally need food and water brought to them.

Zone four: the forage zone.
The forage zone is somewhere you will only visit occasionally to work in, although you may well choose to wander here to relax more often. This far from the house you will be harvesting plants that need very little care; they look after themselves most of the time.
Depending on the size of your plot, this can be the area for forest gardening or for agroforestry. It can be a semi-wild area where some of your favourite wild fruit and herbs grow, such as blackberries or wild garlic.
It’s a semi-managed area, so you can prune occasionally to encourage the plants you like, and perhaps inoculate logs with fungi.
If you are lucky enough to have plenty of space, this is where you can grow trees such as willow and hazel. These are good for coppicing for woodcrafts, for basketry and for firewood.

Zone five: the wilderness zone.
The Wilderness Zone is a natural, undisturbed ecosystem where human impact is minimized. This can be a good place to observe how things work in nature and to learn from this. You’ll dive deeper into the outer zones in the next module, about Big Land and the Economy of Scale.
In summary, the home system is made up of many interconnecting parts. As a sub-system of your greater design it relates and connects to other components and zones in the greater system of your design and life. Try examining the interrelationships between all of those parts. Each of the components within your design should intelligently and efficiently connect.
In a thriving home system, gardens are filled with perennials, fruits, vegetables, flowers, and herbs. Pantries, root cellars, and freezers are stocked with home grown goods. The apothecary is stocked with homegrown and wildcrafted medicinal tinctures, elixirs, tea blends, salves, and other herbal remedies.
The garden shed is tidy and only contains tools you use regularly. The office is organized, hard copy and digital files are clearly labeled and easy to find. The home is organized and clutter free. Belongings and things in the home serve a purpose.
In an ideal scenario, energy is collected from the sun, building materials are gathered on the site, water is harvested from the rain, methane gas is produced from waste, soil is made from compost, seeds are saved, food is produced on site, and no waste is produced.
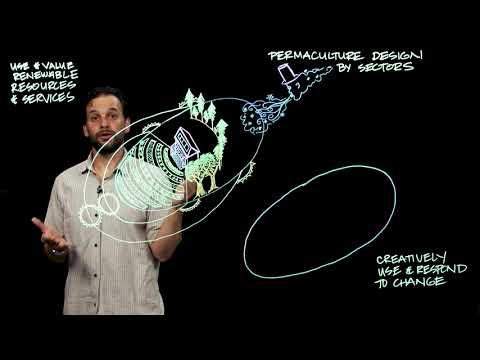
Introduction to Sector Mapping & Analysis
In the first video, you heard many different sectors, or influential factors, mentioned. Some of these are things you will have noticed in your own observations. Observing these sectors and becoming familiar with them is important because they affect what steps you will want to take in and around your home system.
For example, you may want to protect your home from cold winds or hot sun by growing a wind break or some shade. We can also take advantage of these same sectors by capturing and storing their energy, for example with passive solar design or with solar panels.
Water is another important sector that influences and plays a part in the home system. Observing your local topography will help you understand where water is coming from and going to through the land. With this knowledge, you can make informed choices about where to plant things depending on their need for water. You can augment the natural availability of water through rainwater storage and use. If your watering system can be designed to flow down a slope from the water butt, you can avoid unnecessary carrying of water, or the need for a pump.
Taking advantage of the different sectors is worthwhile when looking at the home system. This may mean looking at problems and considering how they can be turned into something beneficial, or at least how mitigating the problem could involve introducing something pleasing, such as planting an edible windbreak.
Don’t forget human sectors! These could include transit lines, roads, concrete, political regulations, nearby factories, street lights, crime, noise, pollution, pets, smells, pesticide drift, etc. It’s also important to pay attention to the bordering properties. Developing good relationships with your neighbours could reap benefits and help avoid problems.
And of course: include the less-obvious, non-physical sectors.. Your inner landscape, social networks and economics are all relevant here.
Sector Mapping
this section by Pippa Buchanan
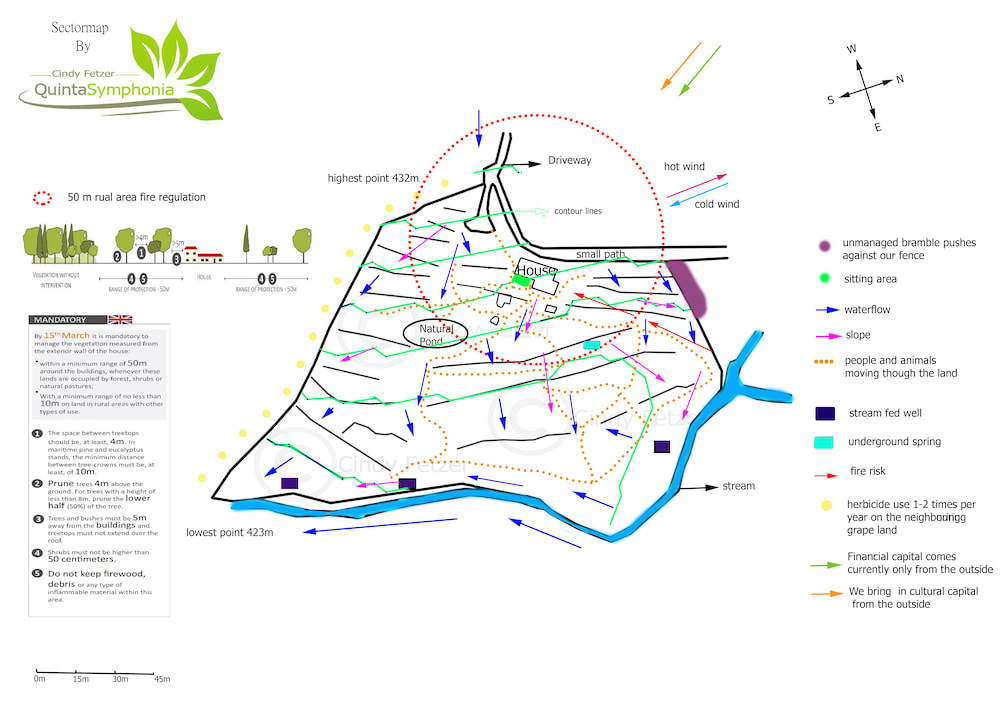
Sector mapping is a critical tool for visually representing observations about the “sectors” or external forces and elements that move through or otherwise influence your project. The sectors you record can be related to effects on the site caused by climate, ecology, geology, topography and society. For example sun paths, wind and rain patterns, invasive plants, wildlife, pollution, neighbors, areas of high fire threat, views and noise could all be recorded on your sector analysis layer. Sectors are often represented as labelled wedges, arcs or arrows representing the origin and direction of the element. However, rocky areas, contaminated soil, boggy land, or areas of flood risk are better represented as location specific patches over your base map.
Some uncontrollable issues such as geological instability or limiting factors such as legal restrictions are harder to represent visually and are best recorded in writing.
Invisible sectors like laws, economics, and the neighbors’ emotions about your new veggie garden are often overlooked at first, but they can have quite a noticeable effect and we should take them into account.
We can use ecological principles to try and work with all of the sectors, rather than against them. We do this by either using them to our greatest advantage (catch and store energy: e.g. wind power) or simply deflecting them if they are hazardous to us (use biological resources: e.g. plant a windbreak or leave a treeless strip as a fire break). For our design it is important that we always take into consideration the relations, connections, functions and the consequences between all the sectors, in order to then formulate our best response to them.
Part of developing a Designer’s Mind is about making observations free of bias. The forces recorded on a sector map are neutral and can be both beneficial or harmful. Let’s take wind as an example. Perhaps you noticed that dry summer winds come from the east. That’s your neutral observation. Analysing that information means asking what are the positive and negative impacts of this. On the plus side, this information may help you work out the best place for a laundry/washing line or to hang produce for drying. At the same time that drying wind will quickly evaporate water from soil as well as dams or ponds, so you may start considering adding windbreaks or hedges on the eastern side to moderate the impact of the wind and reduce evaporation.
But perhaps the boundary on the eastern side is really close to the house, and there’s no room for a hedge. This is where zones and sectors can help guide the placement of components so that they make best use of or mitigate the risks of that sector. Sector analysis influences which zones are placed where, but at the same time, zones influence the strategies used to respond to external forces. In outer zones such as 3 or 4, lower cost, less energy intensive solutions such as windbreak plantings are used to slow the wind. Closer to the home, more intensive solutions such as walls or use of grey water might be used to protect water-demanding plants, animals and people from a drying wind.
Different sectors also overlap and interact with each other. For example, when you start reflecting on your observations about water on your site – where it comes from, where it goes – how you analyse this information and start using in your design is affected by the soil, the slope and contours of your site, and also by the climate and the seasonal patterns of rainfall.
The potential for disaster happens when systems can not handle extremes or cumulative stress. One week of limited spending may be a challenge, but a medical bill on top of long-term debt and structural poverty may force a family into homelessness. Water is essential for life, but the extremes of either drought or flood-causing torrential rain can cause havoc in both natural and human systems.
Designing land, the built environment, lifestyles, livelihoods and organisations to deal with extremes as well as everyday conditions is essential for resilience. There are many ways in which ecological design and practice supports resilience, but in order to do that it is important to understand what extremes are most likely to have an impact. This is why careful observation and sector analysis is so important for a successful project.
We know, it’s overwhelming! Remember to use small and slow solutions. Focus on the tangible goals first.
One day at a time.

Homework
All module homework is considered “optional but strongly recommended,” but THIS HOMEWORK here is super important and will come up again in the Design Studio real soon 🙂
Questions for Review
- How will using zones help your design project achieve its goals?
- Describe how sectors could influence your layout and use of zones. What sectors will you need to consider when laying out zones for your design project?
- What uncontrollable sectors do you need to consider in the design and use of your home system?
- Think about how you can use the idea of zones and efficient use of energy, time and resources for another aspect of your life. How could zones help you design how you shop, arrange your desk or organize your time?
Hands-On
Note: as you know, most of the homework in the topical modules is optional/suggested, but please note that your final design will need to include a base map and zone and sector maps!
- Practice “systems thinking.” What does that mean to you? Write about it, talk about it, try to embody it as you move through your day. Go HERE and explore the amazing tools from Donella Meadows. Go HERE too.
- Start working on your base map. Don’t obsess over it! Just do something simple, and try to make it to scale.
- Draw a zone map which describes how spaces are currently used either inside or outside the immediate living space. Your first zone map could act as a real time inventory of your property, your activities and the things in it. Be transparent when creating the zone map. Include the clutter, the chaos, and the things that are not working, and work toward eliminating those things in real life and in your dream scenario.
- Also draw a rough-draft sector map. We’ll come back to sectors a few more times before the end of the course, and your final design will includes several sector maps, but for now just sketch out as many sectors as you can discover on one draft.
- We’ll get more into mapping in the Design Studio, so just start practicing now, and hope over there when you’re ready to get serious about your project.
A note about the resources we’ve curated for this course:
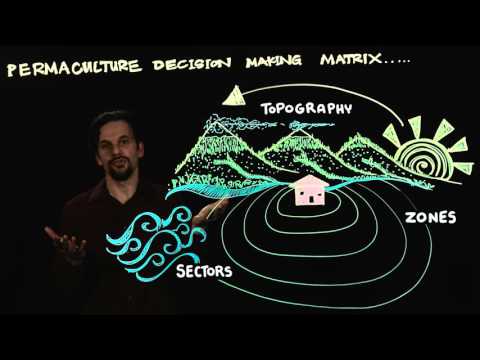
However, in some cases it is simply remiss for us to ignore valuable resources offered by the men! And this is one such case: Oregon State University offers a free online intro course every Spring, which teaches beginner-level zone and sector mapping. In addition, many of their full-course videos can be found on YouTube, and they are well worth watching. In fact, we highly recommend you watch them all, since they have done such a good job and been so generous as to make it available to the public. We’ll link a few below, about zones and sectors. We also appreciate the “decision making matrix,” which he describes in the third video.
Click through to youtube to watch these in full screen and discover the channel, which is packed full of super interesting videos!